In this article, we’ll create a task in a scheduler by dragging an e-mail into a folder. This scenario could be useful, for example, for managing and processing customer requests in the context of after-sales service.
We’ll be using :
- Outlook to create a specific folder,
- PowerAutomate to read the folder and create a task
- Planner to store tasks
Summary
Focus on PowerAutomate and Outlook
PowerAutomate detects when an e-mail arrives in your mailbox or when you place a tracking flag on an e-mail.
However, PowerAutomate will not detect when you move a mail to launch specific actions. So we need to find a workaround.
Focus on Planner
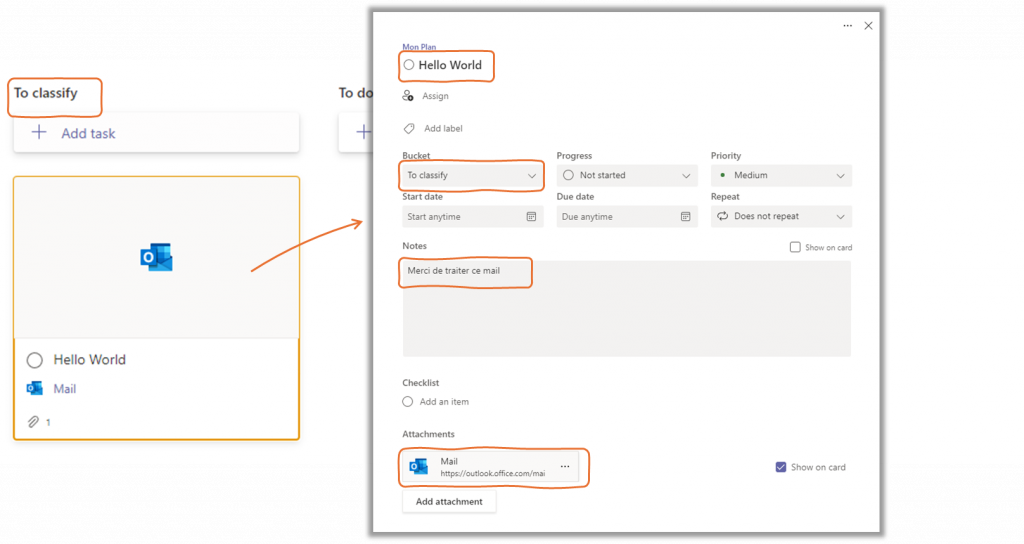
Planner, a tool integrated into M365, lets you manage your personal actions or those of a team, by assigning tasks to compartments.
In Planner, you can manage and customize your compartments, create tasks in a compartments, and assign tasks to team members. In this article, we’ll look at how you can create a task from an e-mail in your inbox.
Requirements
A. Create a plan in MS Planner (see Create a Plan) named « My Plan«
B. Create a compartment named « To classify » in your new Plan
C. Note the Plan Id in URL of your plan :

D. Create a folder « ToPlanner » in Outlook
E. Create a folder « Pending » in Outlook
Create a Flow in PowerAutomate
1. Go to https://make.powerautomate.com
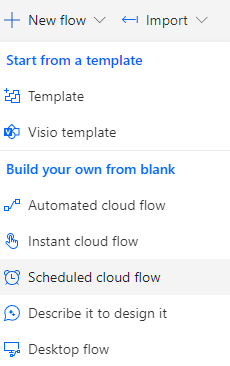
2. Click on My Flows > New Flow > Scheduled cloud flow
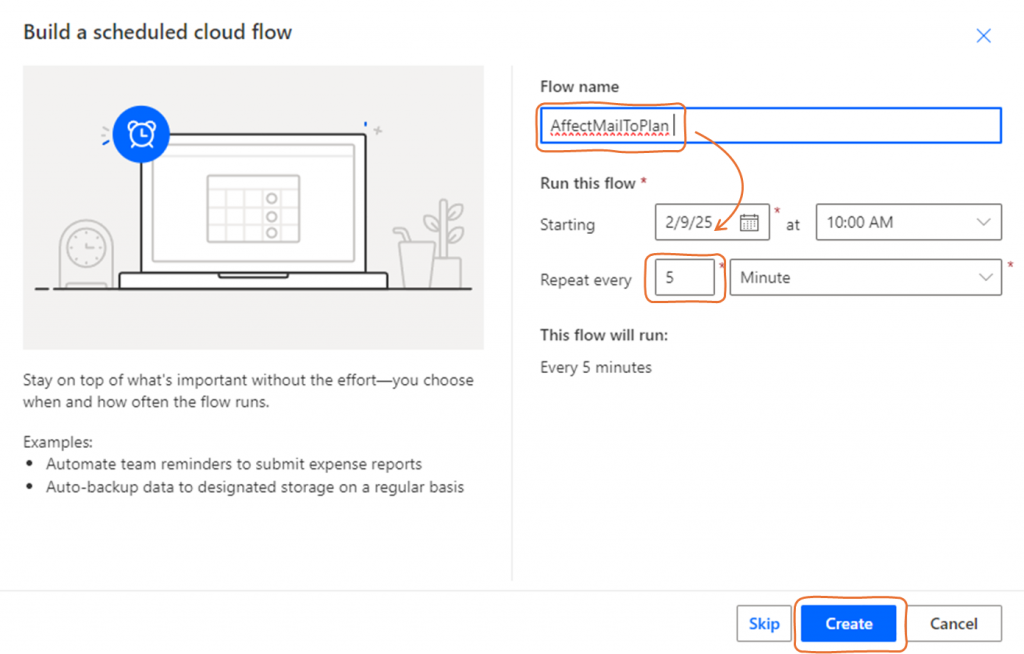
3. Set AffectMailToPlan value to Flow name field and click on Create
Read mails in Mailbox Folder with PowerAutomate
4. On Edit Flow page, click on + under Trigger Recurrence
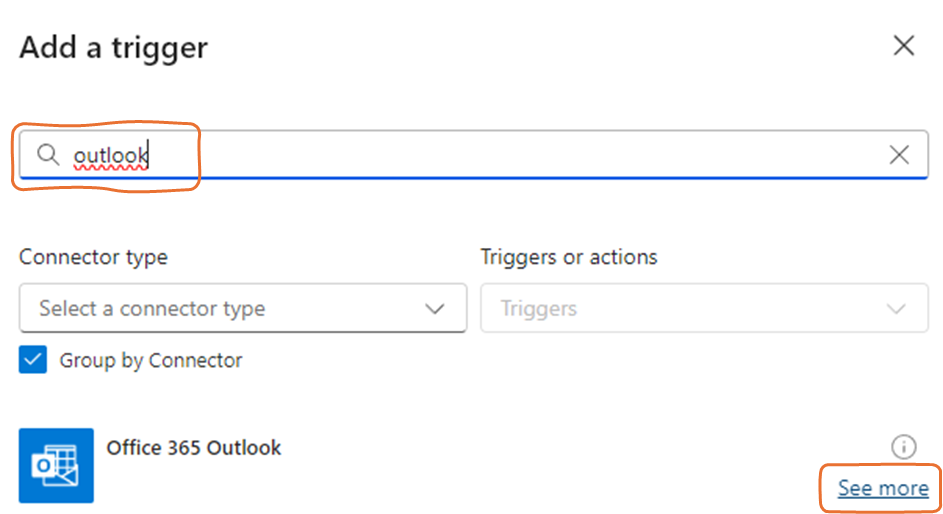
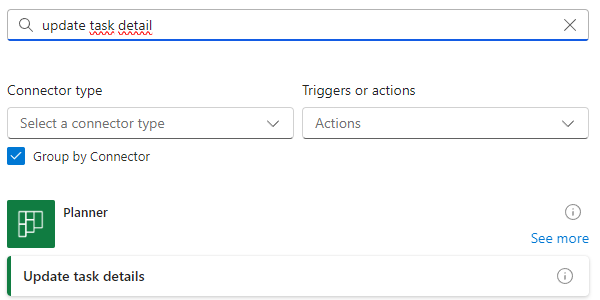
5. Select Outlook in Search Field and click on See More to see all actions for Office 365 Outlook connector
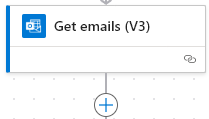
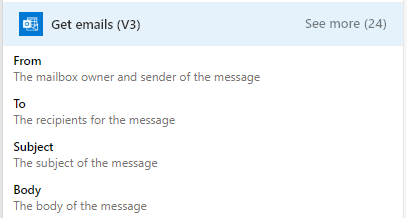
6. Select Get emails(V3) action from Office 365 Outlook connector

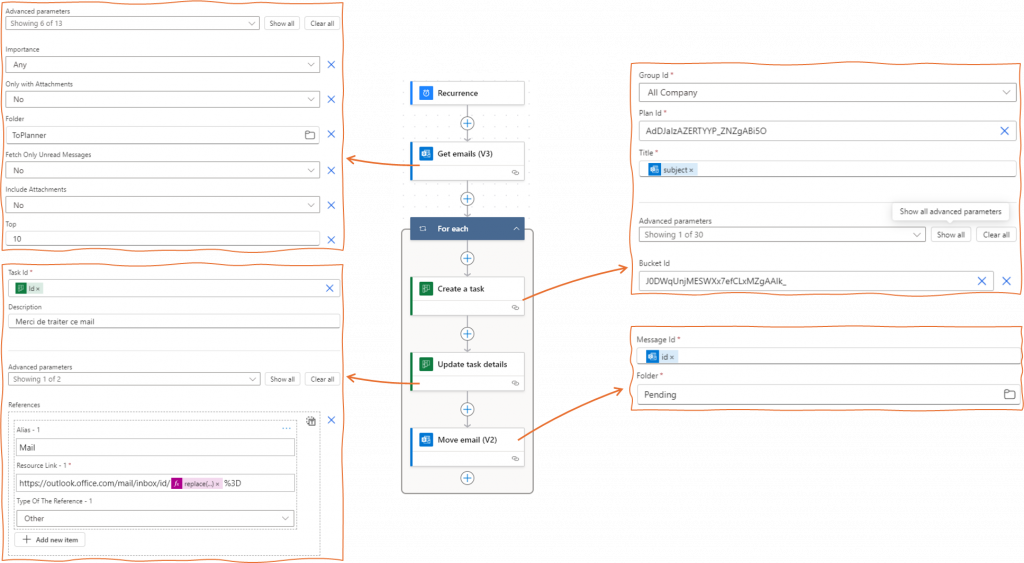
7. Click on Folder icon and select your ToPlanner Outlook Folder
Click on the folder icon to open the contents of your mailbox and view all the folders in it.

8. Click on + under Get emails (V3)
Create a Task Planner in PowerAutomate
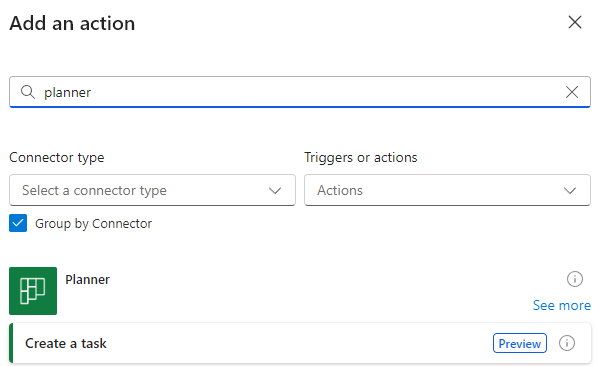
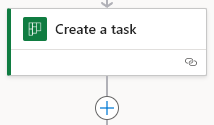
9. Search Planner in Search Field and select Create a task Action from Planner connector
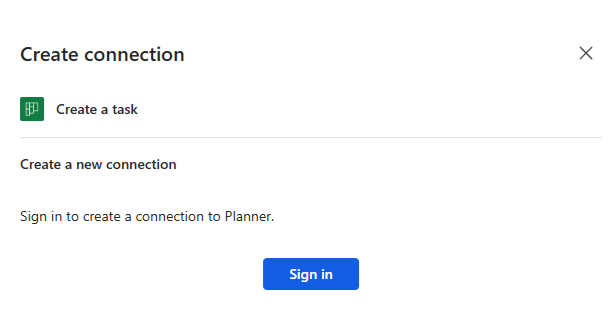
10. Create a connection if you’ve never used this component before
11. Select AllCompany in GroupId
You can – if you have a team plan – select a team.
12. Set Plan Id Value (see Requirement B) in Plan Id
13. Click on Flash icon in Title Field
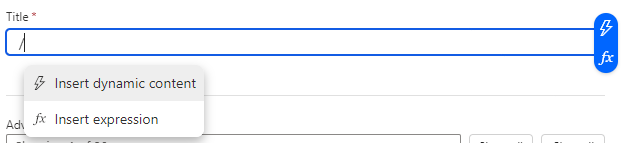
14. Select Subject from Get email (V3) action
PowerAutomate will automatically wrap your action in a loop. This loop will go through all the mails found in the Myplanner folder of your mailbox.
15. Select in Bucket id your new compartment To classify (See requirement B)
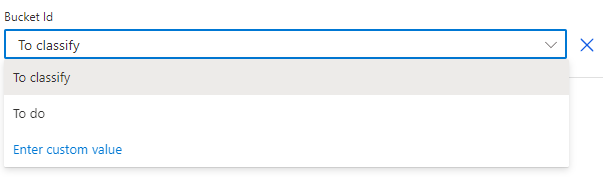
In PowerAutomate, the compartment of your planner is designated by Bucket
Add more informations to new task planner
Now we want to fill in the description of the new task and add the link to access the e-mail directly from Planner.
16. Click on + under Create a task action
17. Select Update task detail from Planner connector
18. In Task id, select the ID from Create a task action

19. Add a information to Description Field
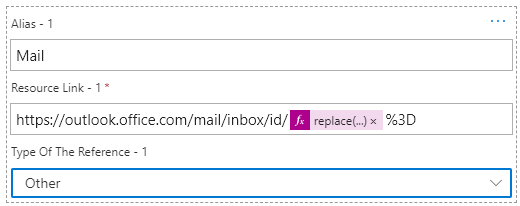
20. In References Fields, click on Add new Item

21. In Ressource Link, set the following formulas :
https://outlook.office.com/mail/inbox/id/@{replace(replace(item()?['conversationId'],'=',''),'-2','%2F2')}%3D"In this formula, we retrieve the conversation ID from the mail currently being processed. See https://manueltgomes.com/microsoft/how-to-generate-a-link-to-an-email/ to more information
Move the mail to Pending folder
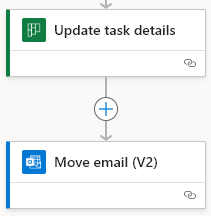
22. Click on + under Update Task details and select Move email (V2) from Office 365 mail connector
23. Set Message Id from Get emails (V3) action in Message Id field. And select Pending form Folder field

Now, You should obtain this flow in its entirety :
Test your flow
A. In Outlook, move a mail in Planner Folder

B. Execute AffectMailToPlan flow
C. Go to planner : https://planner.cloud.microsoft and Select My Plan
D. You have a new Task in To classify Compartment