
When you share a PowerApps app, you need to assign rights to a user.
Either you use the application’s sharing functionality to add a user. This means that you also have to repeat the same operation on the SharePoint site hosting the lists.
This operation can become very tedious and time-consuming.
You can either rely on rights management via a security group.
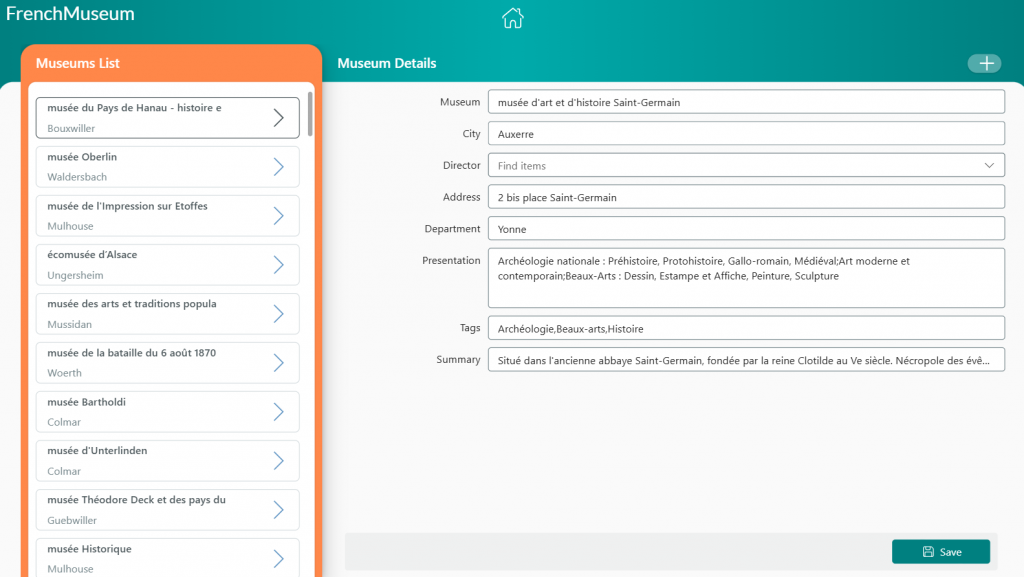
Our case study
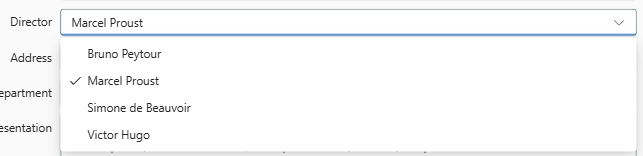
We want to give access rights to a person as soon as we assign them as Director in a Museum file.
We already have the application with a list and details.
Step 1. Creating a Security group With Portal Azur
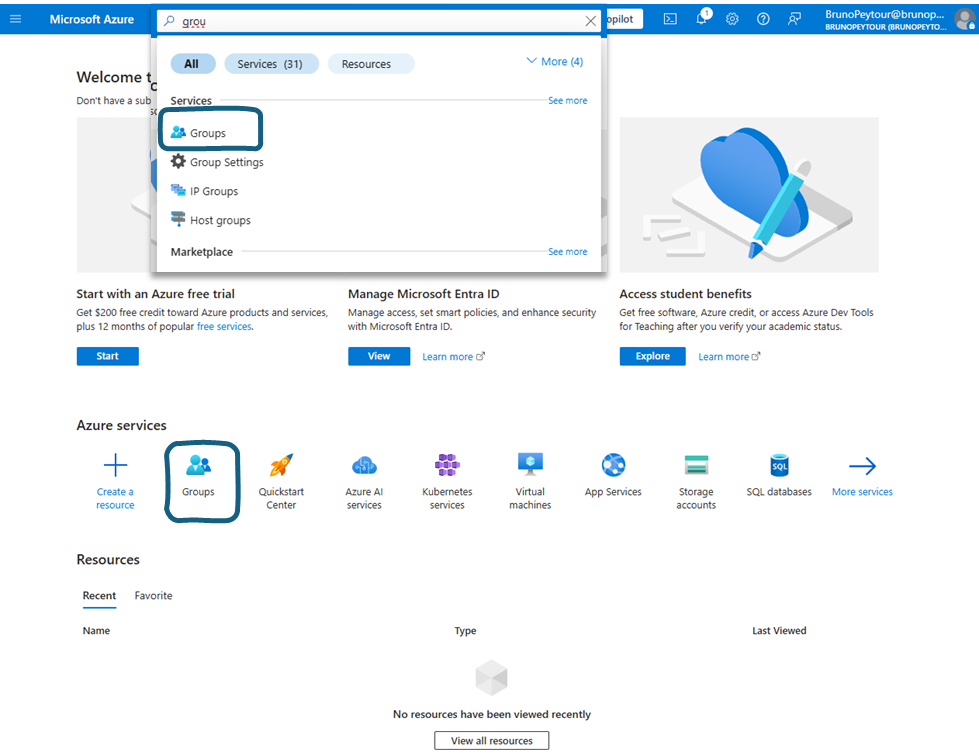
1. Go to the Azure portal :
2. Click on Group or search for Group in the search bar
3. Click on New Group
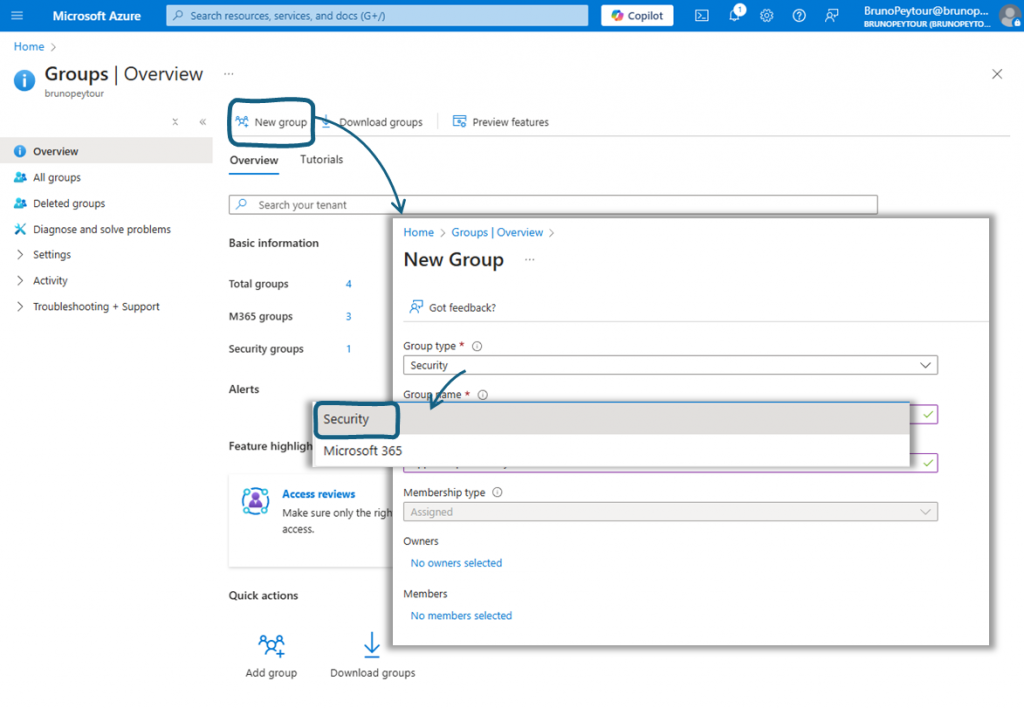
4. Select Group Type > Security
5. Fill Group name and Group Description then Click on Create
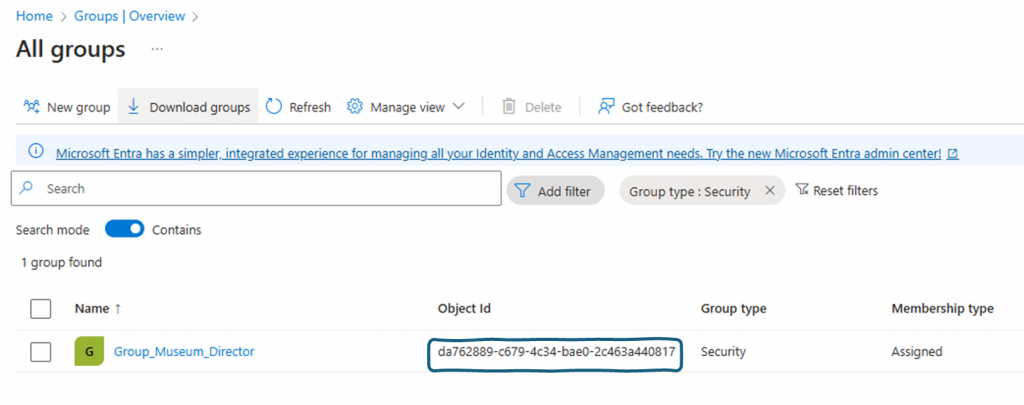
6. Back on the group management screen, click Security Group
7. Note the ID of the newly created group
Step 2. Assigning a user to a group directly in PowerApps
Let’s move on to PowerApps Studio to add the following connectors:
- Office 365 to search for a user in the corporate directory
- Entra ID to add a person to a group
A. Add EntraID Connector
1. Click on Icon Data
2. Click on Add Data
3. Search Entra ID and select Microsoft Entra ID

4. Do the same action with Office365Users
B. Add controls to your page
1. In your Canvas PowerApps page, add a ComboBox control with the name attribute inUsersList
2. Add the following value to the Items property
Office365Users.SearchUser({searchTerm:Self.SearchText}) You should obtain the following result:
3. Add a button control
4. Select the OnSelect property of the button and add this formula
MicrosoftEntraID.AddUserToGroup("da762889-c679-4c34-bae0-2c463a440817", inUsersList.Selected.Id)Step 3 : Check before create!
1. If you click a second time, you should get this error
MicrosoftEntraID.AddUserToGroup failed: { "error": { "code": "Request_BadRequest", "message": "One or more added object references already exist for the following modified properties: 'members'.", "innerError": { "date": "2025-01-25T09:02:57", "request-id": "ba17fbcd-6a69-42a3-b8ca-a8169e02027b", "client-request-id": "ba17fbcd-6a69-42a3-b8ca-a8169e02027b" } }}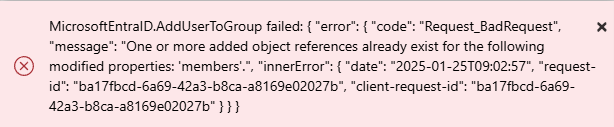
All in all, this is quite logical, as we are trying to add this user again. To do this, we’re going to add a check to make sure that the user we want to add doesn’t exist.
This check is based on the following method :
MicrosoftEntraID.CheckMemberGroupsV2This method can only be called by an event method. Consequently, you will not be able to call it in .Value type methods.
2. Modify the Onchange property of the inUsersList ComboBox control with the following formula:
Set(ctrlExistInGroup, MicrosoftEntraID.CheckMemberGroupsV2(inUsersList.Selected.Id, ["da762889-c679-4c34-bae0-2c463a440817"]).value)Some explanations: :
- With
OnChangeevent, as soon as the user selects a user, a check will be performed MicrosoftEntraID.CheckMemberGroupsV2(userId, groupId).valuereturn a table
3. Add a Label control and the following formula to the Value property:
If(CountRows(ctrlExistInGroup)=0, "You can add this user", "This user in already in Group")The result is as follows:
