
There are several ways to import an Excel file into SharePoint
- Synchronization between Excel and SharePoint
- Import via PowerAutomate
- Creating a list from an Excel file
In this article, we’ll look at the last two possibilities.
We’ll be using the French Museum database as sample file
https://www.data.gouv.fr/fr/datasets/musees-de-france-base-museofile
Method 1: Importing an Excel sheet via SharePoint
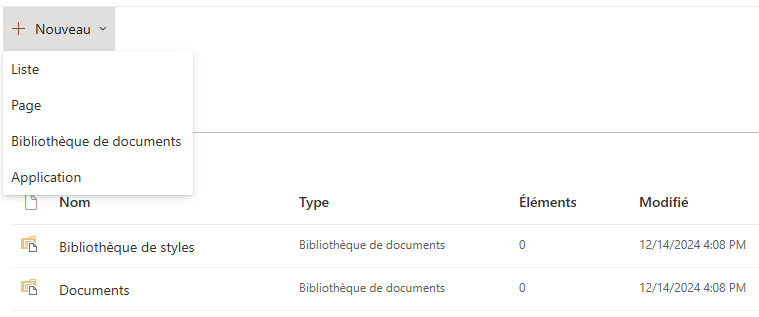
1. In Site Content from SharePoint Site, click on New > List
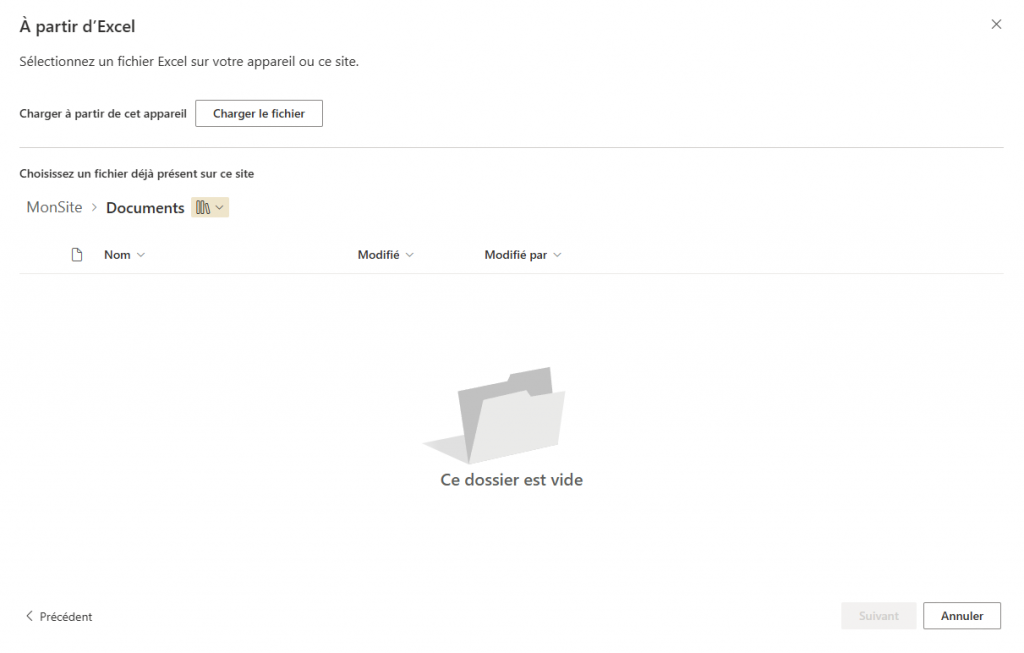
2. SharePoint offers you a wizard. Click on From Excel

3. Click on Load file, select the Excel file you wish to import
First, your data must be integrated into an Excel spreadsheet.
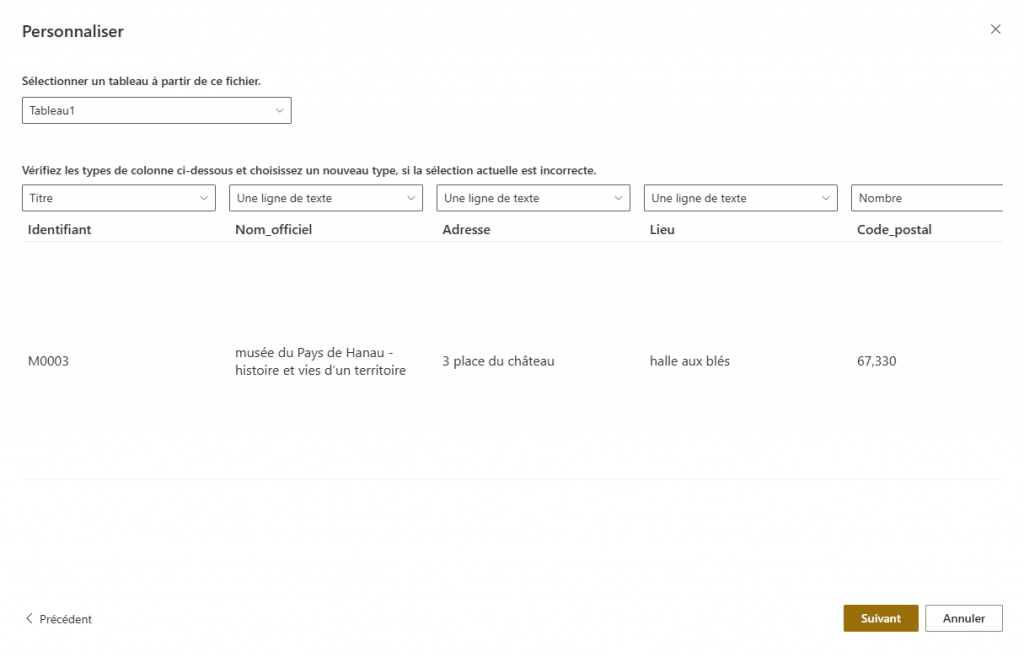
4. SharePoint analyzes the Excel table and suggests a list structure. Click on Next
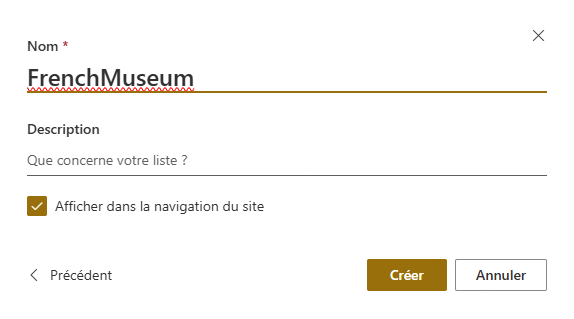
5. Define a name to new list and click on Create
6. SharePoint creates the new list and starts importing data

Method 2 : PowerAutomate
Avec un import via PowerAutomate, vous avez plus de liberté pour traiter les données d’une part et vous aurez à terme la possibilité d’injecter uniquement de nouvelles lignes d’autre part
1. In SharePoint, we create our list with the following structure:
| Nom_officiel | Une seule ligne de texte |
| Adresse | Une seule ligne de texte |
| Lieu | Une seule ligne de texte |
| Code_postal | Une seule ligne de texte |
| Ville | Une seule ligne de texte |
| Région | Une seule ligne de texte |
| Departement | Une seule ligne de texte |
| URL | Une seule ligne de texte |
| Telephone | Une seule ligne de texte |
| Categorie | Une seule ligne de texte |
| Domaine_thematique | Une seule ligne de texte |
| Histoire | Plusieurs lignes de texte |
| Atout | Plusieurs lignes de texte |
| Thèmes | Plusieurs lignes de texte |
| Artiste | Plusieurs lignes de texte |
| Personnage_phare | Plusieurs lignes de texte |
| Intérêt | Plusieurs lignes de texte |
| Protection_batiment | Plusieurs lignes de texte |
| Protection_espace | Plusieurs lignes de texte |
| Refmer | Une seule ligne de texte |
| Annee_creation | Une seule ligne de texte |
| Date_de_mise_a_jour | Une seule ligne de texte |
| Coordonnees | Une seule ligne de texte |
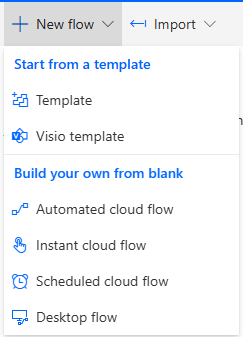
2. In PowerAutomate (https://make.powerautomate.com), clique on MyFlows to create a new flow
3. Then New Flow > Instant cloud Flow
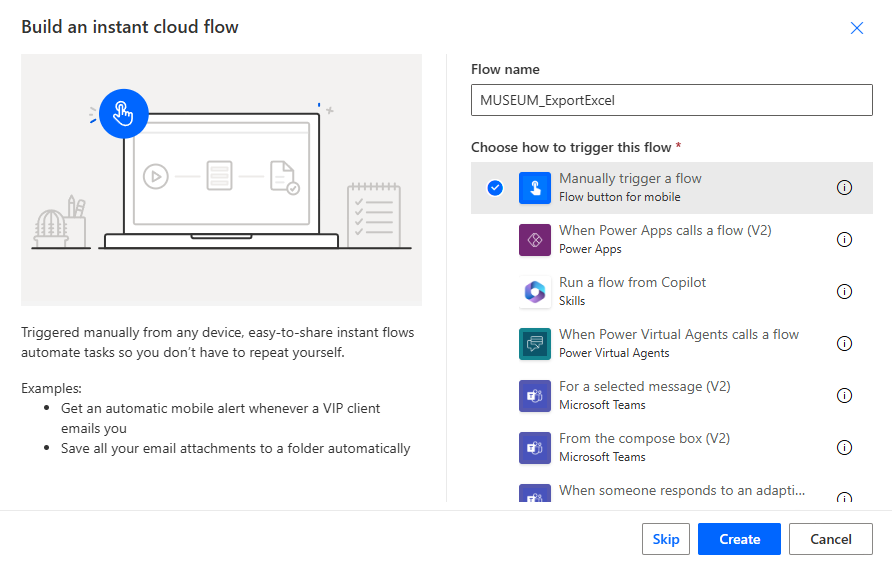
4. Set a name to your new flow and select Manually trigger a flow. then click on Create
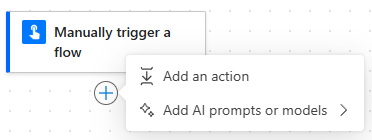
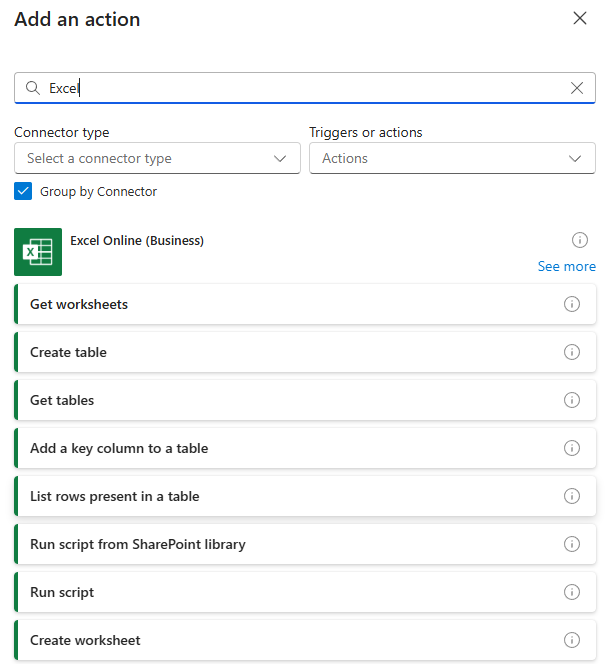
5. You access your flow in edit mode. Click on + then Add an Action to add your first action.
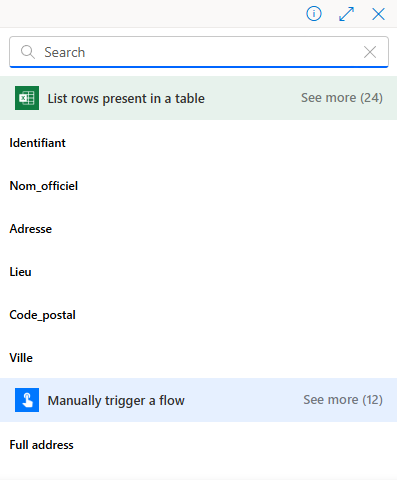
6. Select List Rows present in a table action from Excel Online connector
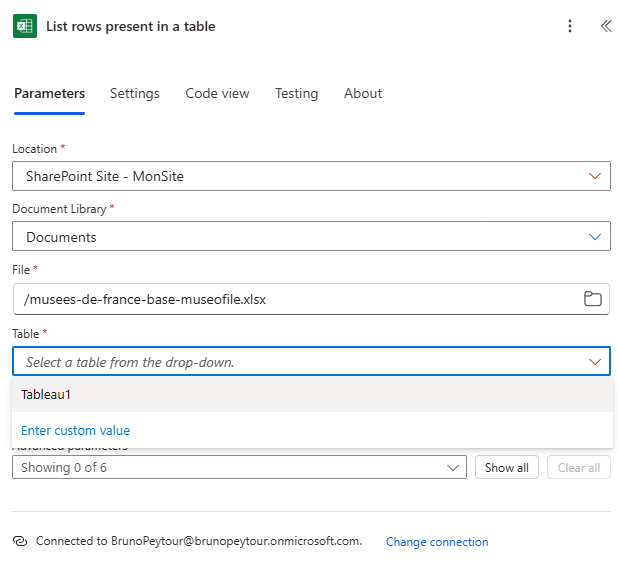
7. Enter the following properties
- Location: PowerAutomate will show you the SharePoint sites to which you have access rights.
- Document : The SharePoint site’s document library
- File : The file you wish to import
- Table : the table you’ve previously defined
8. Define Top property

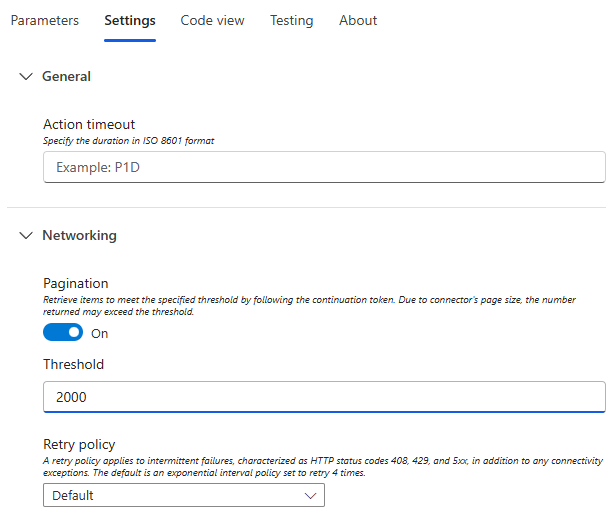
By default, if you leave this value blank, PowerAutomate will extract the first 256 lines. Our file contains 1227 lines.
9. Click on Settings, then Pagination and enter the value 2000
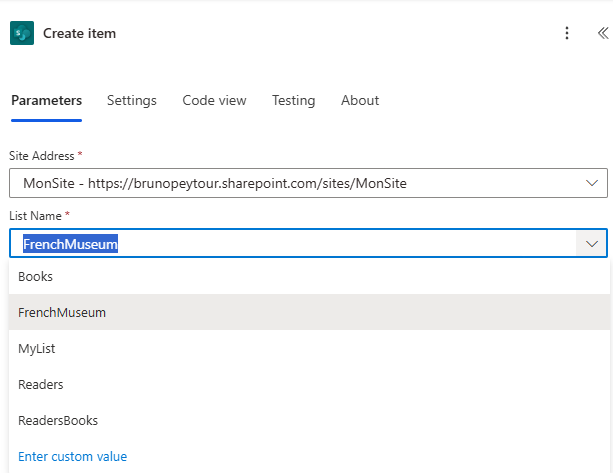
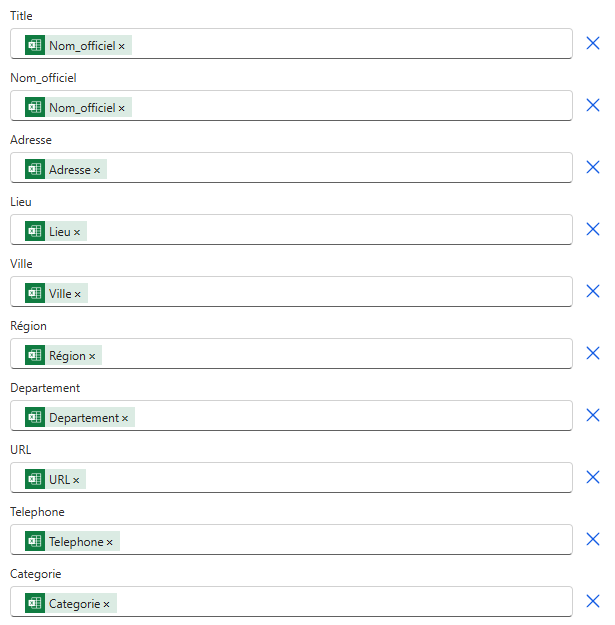
10. Add the Create Item action to the SharePoint connector

11. Enter the site address and select the list into which we will import the Excel datas.
12. Click on Show all to view all fields in the SharePoint list.

13. Click on the Lightning icon to open the wizard

14. Select the Excel field you want to add to the field in the SharePoint list.
15. After completion of the various fields, you should have the following result
16. Click on Save Button and Back Button
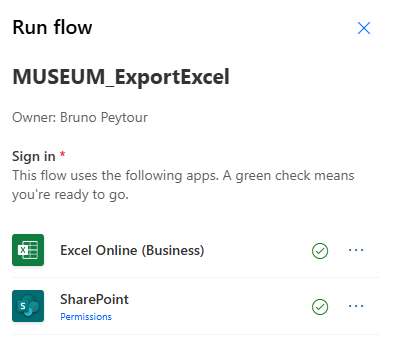
17. Authorize the rights required by SharePoint to run the various connectors. You can see that SharePoint asks for rights to the two connectors used
18. PowerAutomate starts the Flow. You can follow the flow’s progress
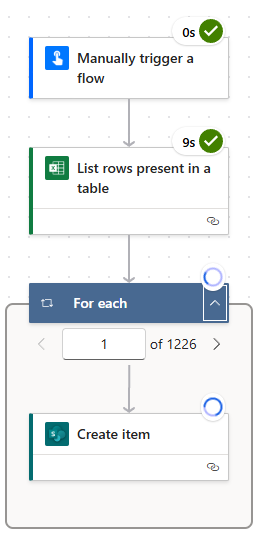
19. In Site Content, you can see that the list includes imported results